Essentials of PowerPoint
PowerPoint is a presentation
program that allows you present information in a slide show format. PowerPoint is an excellent tool for
efficiently displaying information. A
good number of professors you have in college will incorporate PowerPoint
presentations into their lectures in one form or another.
Main Contents:
·
Creating a slide
·
Slide Layouts and
Formatting
·
Importing Work
from Excel
·
Presentation
Effects
·
Presenting the
Slide Show
·
Conclusion
Creating a Slide
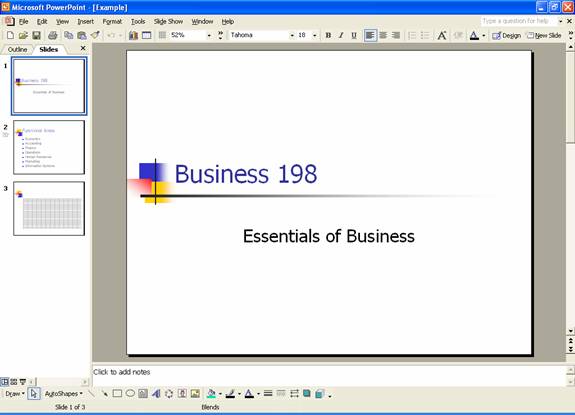
When you open PowerPoint it automatically starts a new presentation with one blank slide. This slide has a default format of a title slide. It allows you to enter a large print title in the center of the slide with a smaller print subtitle below it (we will discuss changing formats later).

![]()
![]()

There are two easy ways to create a new slide. The first way is to click the New Slide button which is at the far right on the top toolbar. The second way is to right-click in the white space below the thumbnail of the slide on the left pane. This will bring up a menu where you can choose to add a new slide, as shown below.
![]()


Now that we know how to create new slides, let’s look at slide layouts.
Slide Layouts and
Formatting
When you first open a new presentation or when you create a new slide, a list of layouts appears in a pane on the right hand side of the screen as seen above. After you have created a new slide but before you have added text, you should choose which layout you would like the slide to have. The first set of choices is Text Layouts. These are used when all you want to display on the slide is text. The second set of choices is Content Layouts. These layouts are used when you would like to add things such as pictures, movie clips, charts, or tables. The third set of choices is Text and Content Layouts. These allow you to combine text you write directly on the slide with any of the content types previously discussed.
You can also add a background to your presentation to give all the slides a similar look. To do this, choose Slide Design from the Format menu. This will bring up a list of designs similar to the list of layouts discussed earlier. You can then choose a background style which can be applied to only the current slide or the entire presentation.
Importing Work
from Excel
If you already have data entered into a spreadsheet into Excel, the simple way to present this in PowerPoint is to just copy and paste it.
1. Create a new slide with the default layout.
2. Select the data or chart from Excel and copy it.
3. Paste the data or chart into the body of the slide.
You may have to resize the chart or data and perform other formatting such as adding grid lines to your chart.
Below is an example of a range of data selected in Excel followed by the same data pasted into a PowerPoint slide.


The following is an example of a graph selected in Excel and the graph then pasted into a PowerPoint slide.


Presentation Effects
After you have written all your slides, it is a good idea to add a few effects. One effect you can use is to have transitions between slides. There are many transitions to choose from such as fade in or blinds. To add a transition to a slide, click on the slide to that it is active and choose Slide Transition from the Slide Show menu. This will bring up the transition menu as seen below.


Here you can choose from a list of transitions and also choose the speed of the transition, whether or not you want a sound played, and if you would like the transition to occur when you click the mouse or after a certain number of seconds.
One other effect that is sometimes good to use is to have only one bullet point show up on the screen at a time. For instance, the slide above has seven bullet points. We can set this slide up to only show the first bullet point when the slide first appears on the screen. You will then have to click the mouse to get the next bullet point to show up, and so on. This is a good idea when you want to emphasize each bullet point in your presentation so that your audience is not distracted by the other information on the slide. To do this you must select the slide and choose Custom Animation from the Slide Show menu. This will bring up the animation menu as seen below.


As you can see, the title and each of the seven bullet points are listed in the Custom Animation menu. From here you can select any of the bullet points and choose how and when you would like it to show up. Near the top of this menu there is a “Start” option with a drop down menu next to it. This is where you can choose to have the selected bullet point show up on the screen when the mouse is clicked. You can then do this for every other bullet point on the slide.
It is always good to remember that PowerPoint is a tool to present main points to an audience. It is the job of the presenter to go into more detail about the main points on the slide. A good rule of thumb is to limit each slide to about five lines. Also, all the information on a single slide should relate to a single main point. In general, keep things simple.
Presenting the
Slide Show
 After
you have written all your slides, added content, and put in transitions, it is
now time to present your slide show.
There are basically three things you need to know: how to start your
slide show, how to stop your slide show, and how to navigate between slides
during the slide show. There are three
easy ways to start your slide show. The
first would be to choose View Show
from the Slide Show menu. The second would be to simply hit the F5
key. The third way is to click the Start Show button which last button on
the right shown below.
After
you have written all your slides, added content, and put in transitions, it is
now time to present your slide show.
There are basically three things you need to know: how to start your
slide show, how to stop your slide show, and how to navigate between slides
during the slide show. There are three
easy ways to start your slide show. The
first would be to choose View Show
from the Slide Show menu. The second would be to simply hit the F5
key. The third way is to click the Start Show button which last button on
the right shown below.
WARNING: Clicking this button to start your slide show will start the show on what slide is currently the active slide. You must make sure you have the first slide selected before you click this button.
After you have started your slide show it is important to know how to navigate between slides. There are three easy ways to navigate between slides while you are presenting your slide show.
- The left and right arrow keys.
- The right arrow will advance your slide show forward.
- The left arrow will advance your slide show backward.
- The up and down arrows.
- The down arrow will advance your slide show forward.
- The up arrow will advance your slide show backward.
- The mouse.
- Clicking the left mouse button will advance your slide show forward.
- If you would like to move to a previous slide with the mouse, you must right click and choose Previous Slide from the menu that appears.
Conclusion
PowerPoint is an effective presentation tool that you will be exposed to in many of your college classes and most likely use in your professional career. PowerPoint has many functions to make your presentation be very flashy and complicated; however, remember that it is still the job of the presenter to make an effective presentation. Even though you might have a very flashy PowerPoint presentation, you will lose your audience very quickly if you yourself do not present effectively. I can all but guarantee that you will experience a poorly done presentation at one point during your college career.
Remember to keep the amount of information to about five
lines per slide, and just to keep things simple.